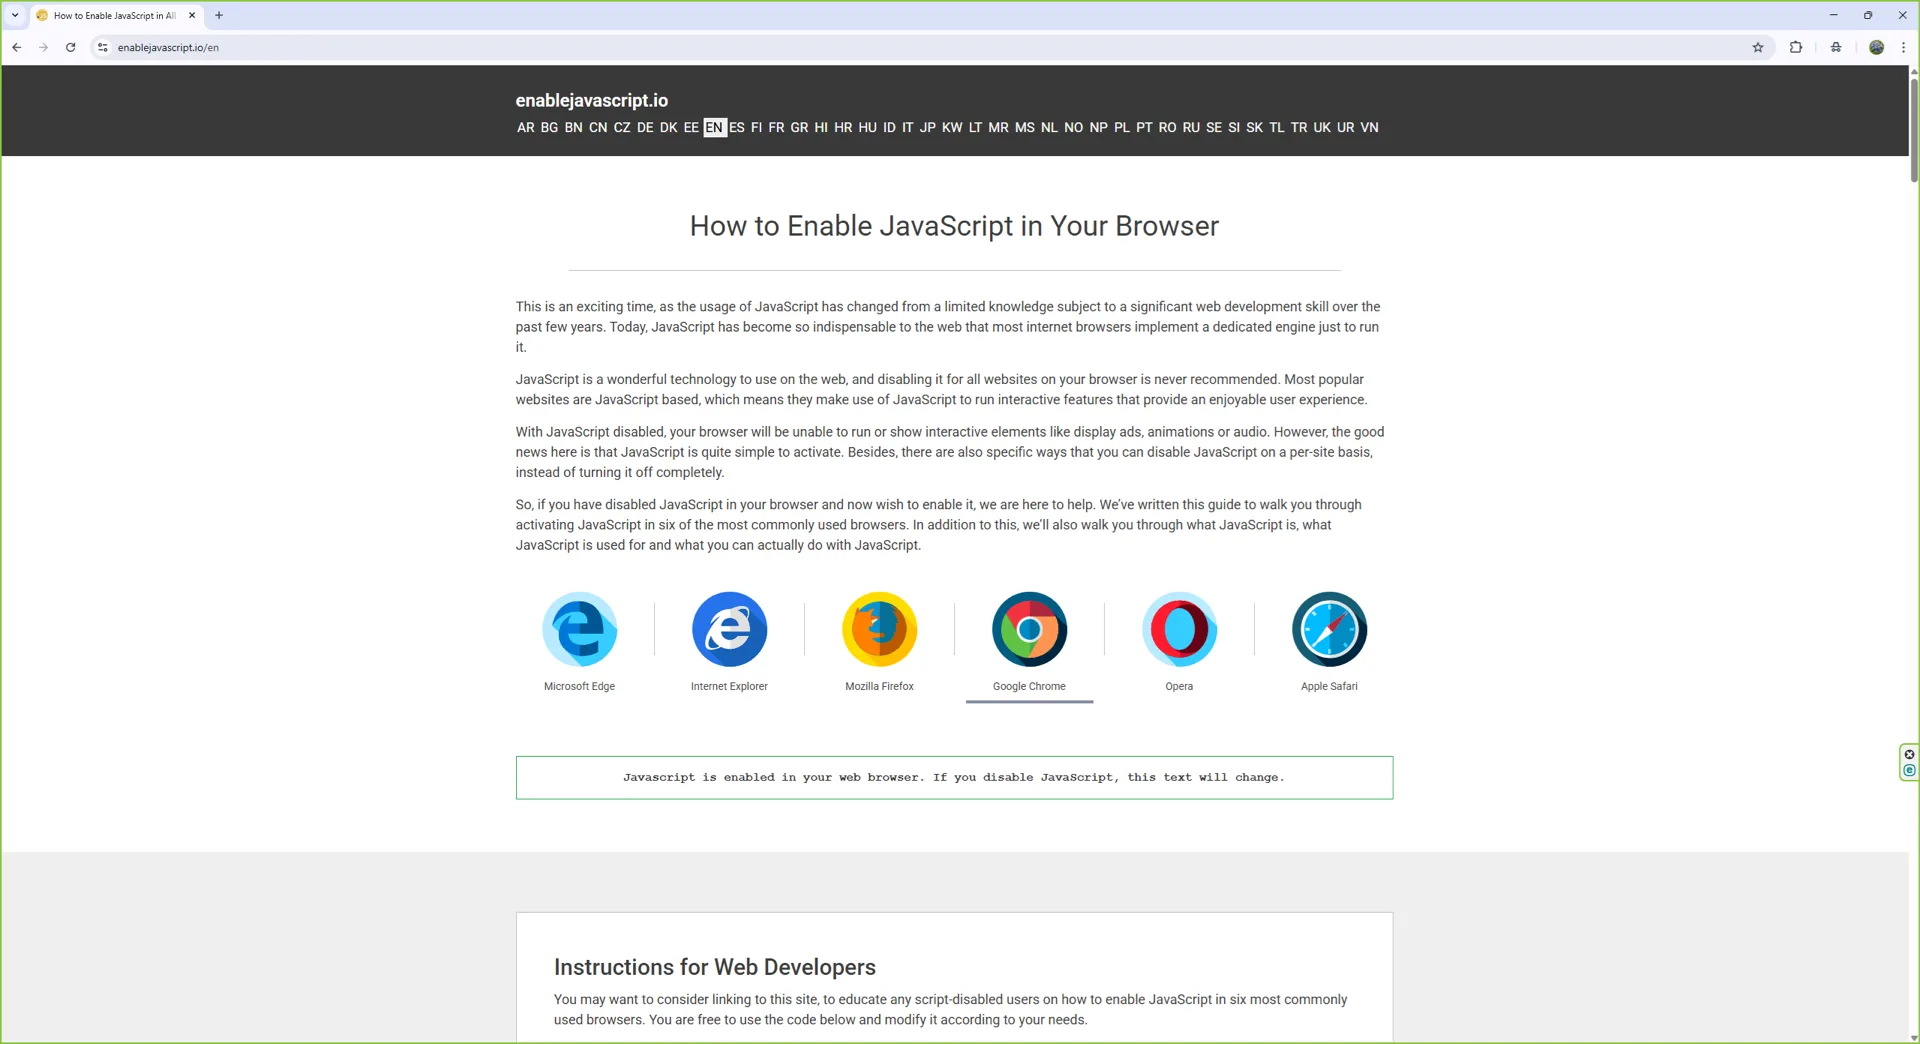
How to Disable JavaScript on Google Chrome

Most people land on guides like this for the opposite reason: they want JavaScript on, not off. But there are real, legitimate reasons to switch JavaScript off in Google Chrome. You may be defending against tracking and fingerprinting scripts, checking how your own site degrades for users without JS, squeezing extra battery and CPU out of an older laptop, or simply trying to read a long article on a site that loads ten megabytes of widgets just to show you 800 words. All of those are valid, and Chrome supports every one of them with the same toggle.
This guide covers the full disable workflow on the current version of Chrome (version 120 and up, as of 2026): the global off switch, per-site exceptions for the handful of pages you actually trust, the chrome://settings/content/javascript shortcut, keyboard tips for Mac and Windows, and a quick way to verify JavaScript is really off. It also includes the warning you need before flipping the switch, because a lot of the modern web simply does not work without JavaScript.
Before you disable: read this
With JavaScript globally turned off in Chrome, expect the following:
- Most single-page apps (Gmail, Google Docs, Slack, Notion, X/Twitter, Facebook, Instagram, YouTube comments, online banking) will not load past a blank screen or a static fallback message.
- Login forms on many sites will fail silently, because the submit button is wired up in JavaScript instead of a plain HTML form.
- Search boxes that use autocomplete, infinite scroll, video players, captchas, and "Add to cart" buttons will frequently break.
- Many news sites and blogs work surprisingly well, because the body text is in the HTML and the JavaScript is mostly ads and analytics.
The recommended setup for most people is block by default, allow-list a few trusted sites. That way you get the privacy and performance wins everywhere, and the handful of sites you genuinely use day to day still work. Steps for that allow-list workflow are at the end of this guide.
Disable JavaScript globally in Chrome (Windows, Mac, Linux, Chromebook)
The same toggle exists on every desktop platform Chrome supports, because the Settings page is rendered by Chrome itself rather than the operating system. The menu chrome around it differs slightly between Windows and macOS, so the walkthrough below covers both. Linux and Chromebook screens look essentially identical to the Windows flow.
1. Disable JavaScript in Chrome on Windows 11
Step 1: Open Chrome
Launch Chrome from the Start menu or taskbar. You can keep any tab open while you change the setting; the new behaviour applies to every page once you reload it.
Step 2: Open the Chrome menu
Click the three-dot menu in the top-right corner of the window. On Windows you can also press Alt + E to open the same menu from the keyboard.
Step 3: Open Settings
Choose Settings from the menu. Chrome opens a new tab at chrome://settings with the Privacy and security panel one click away.
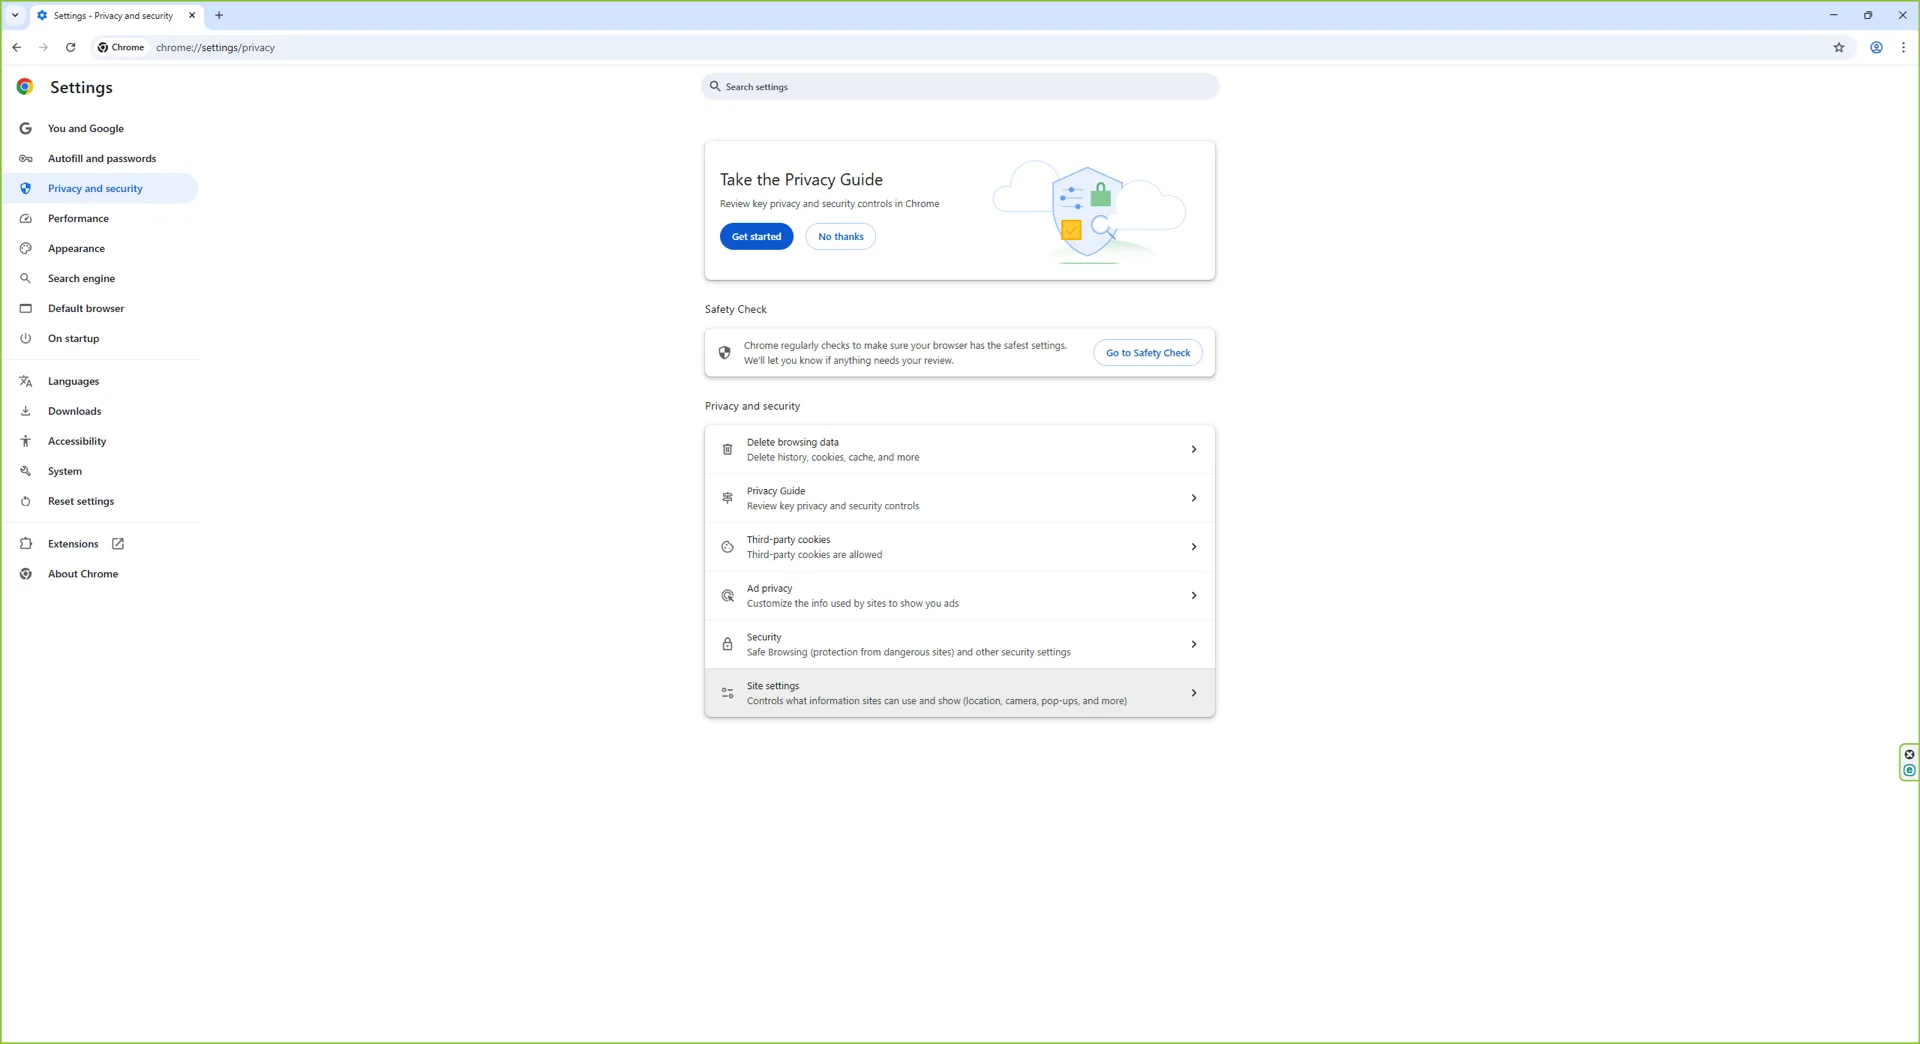
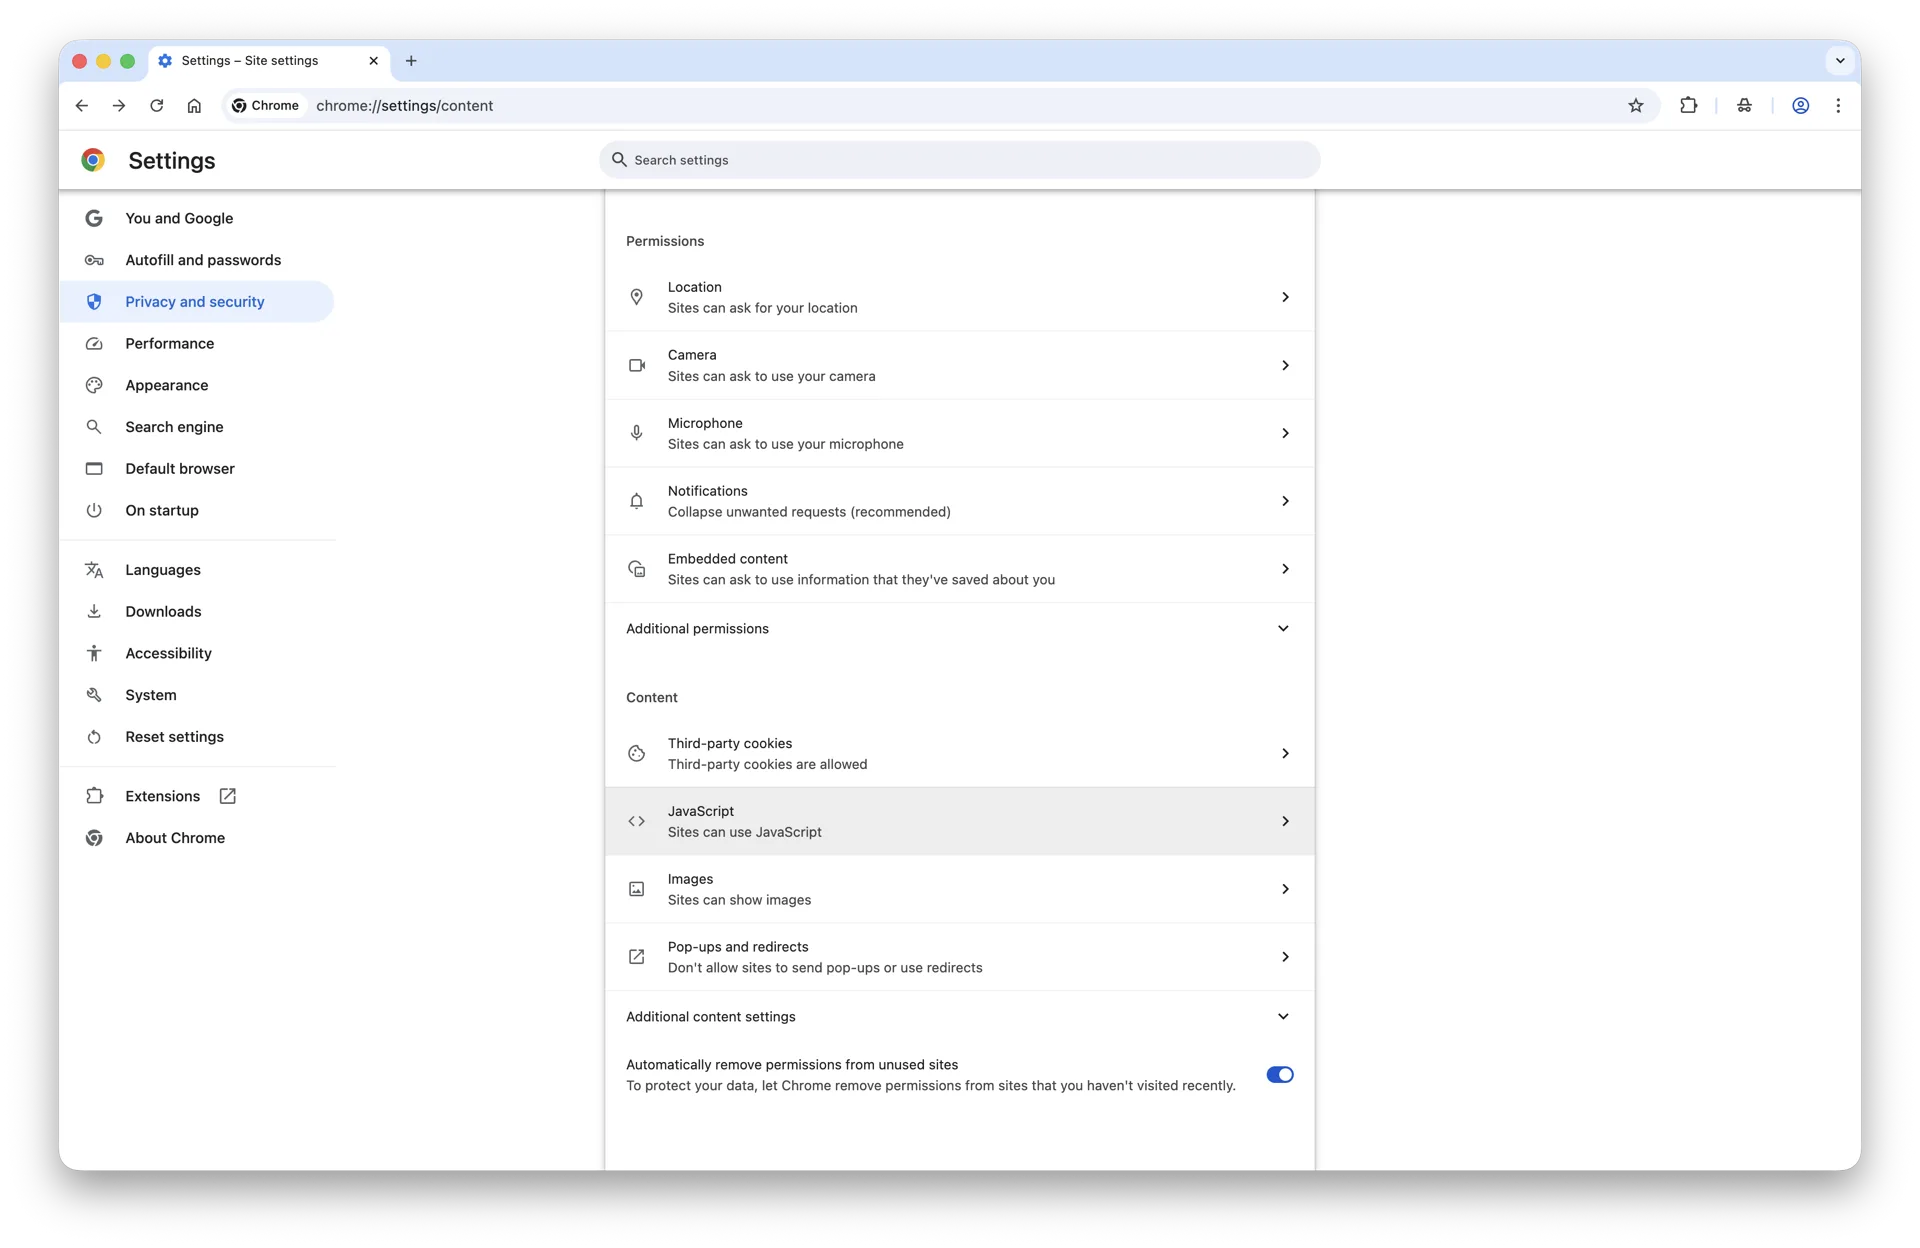
Step 4: Go to Privacy and security, then Site settings
In the left-hand sidebar click Privacy and security, then click Site settings. Scroll down to the Content section.
Step 5: Open the JavaScript permission
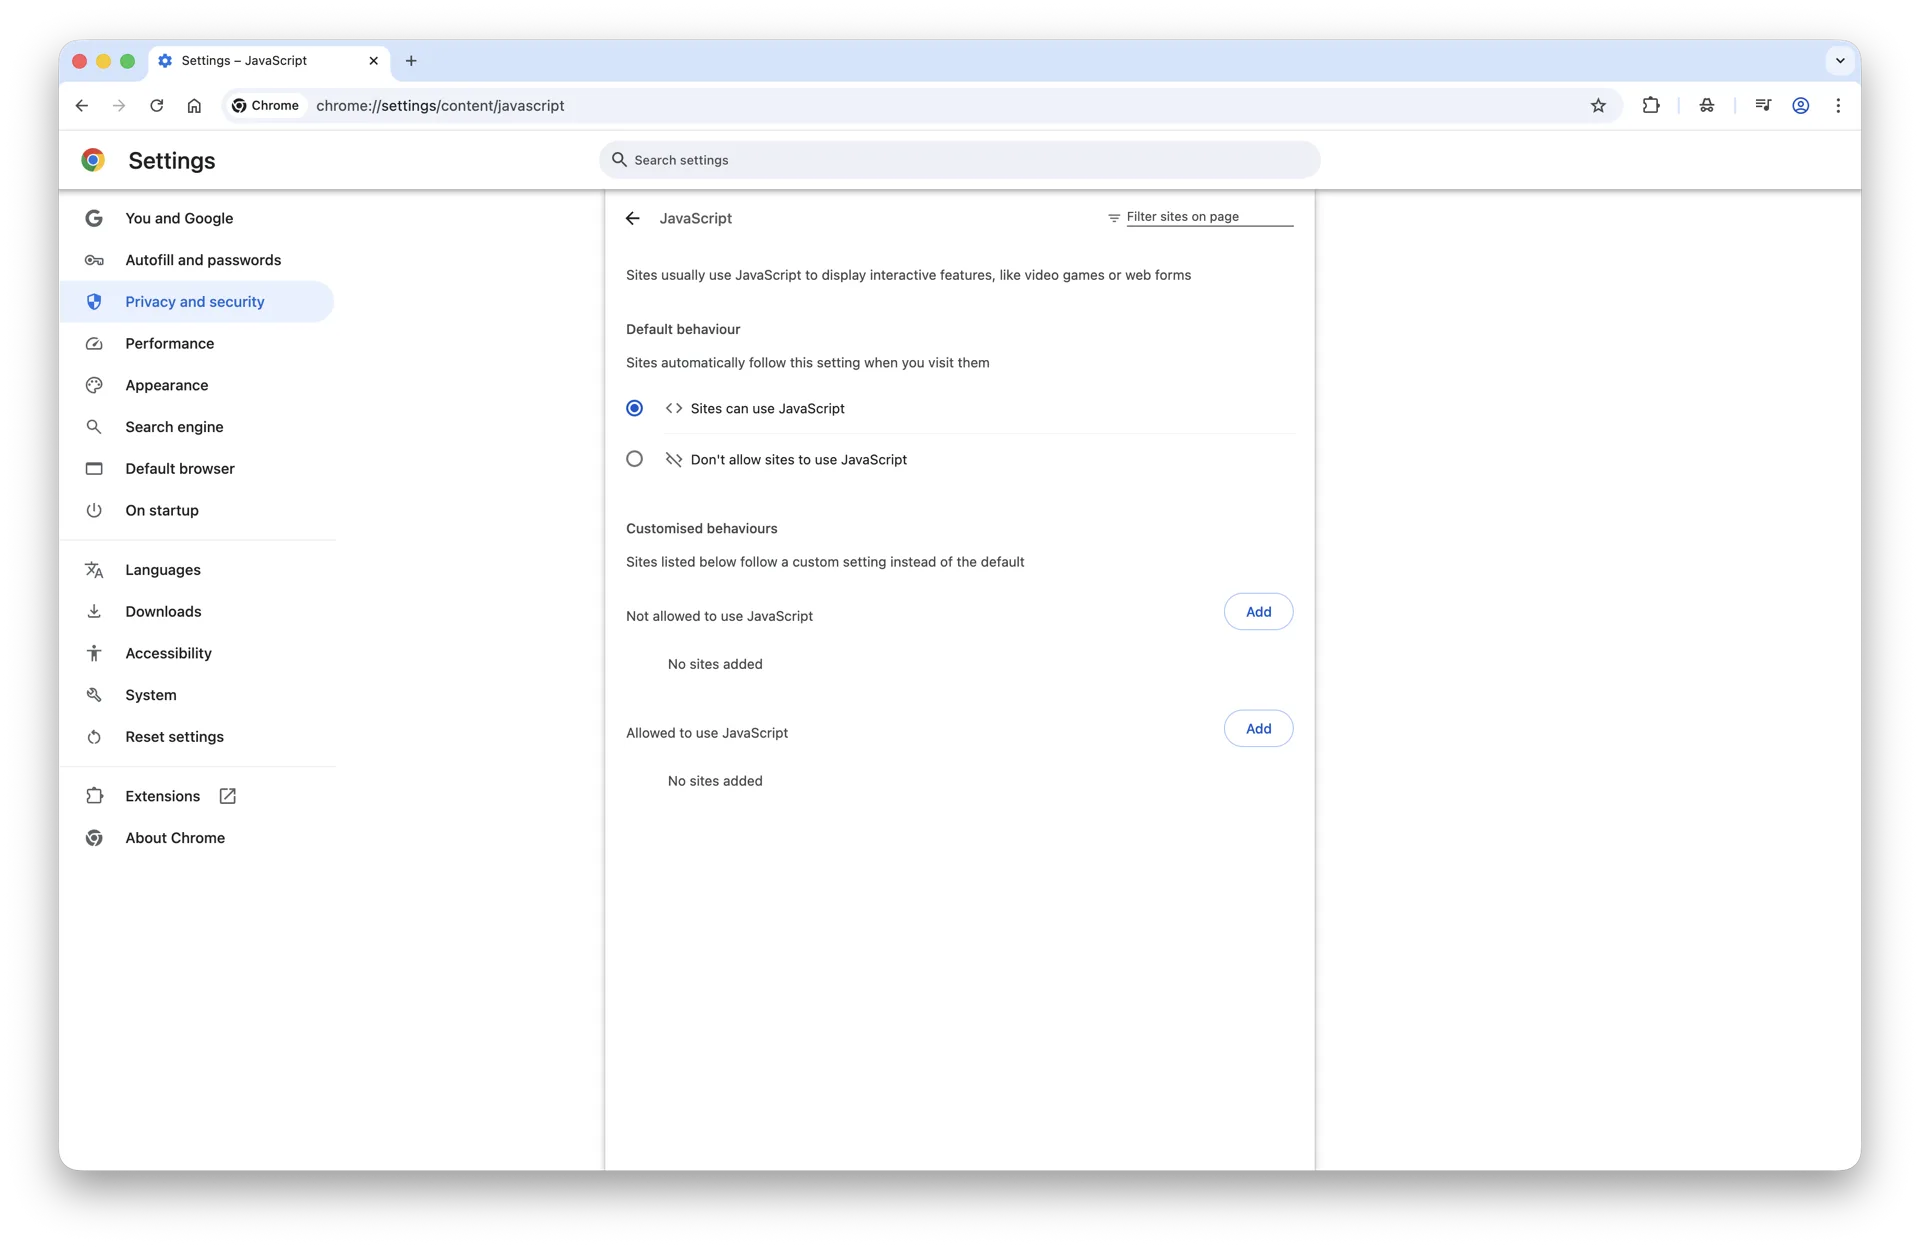
Click JavaScript in the Content list. Chrome opens the JavaScript permission detail page, where the global default and the allow/block lists live.
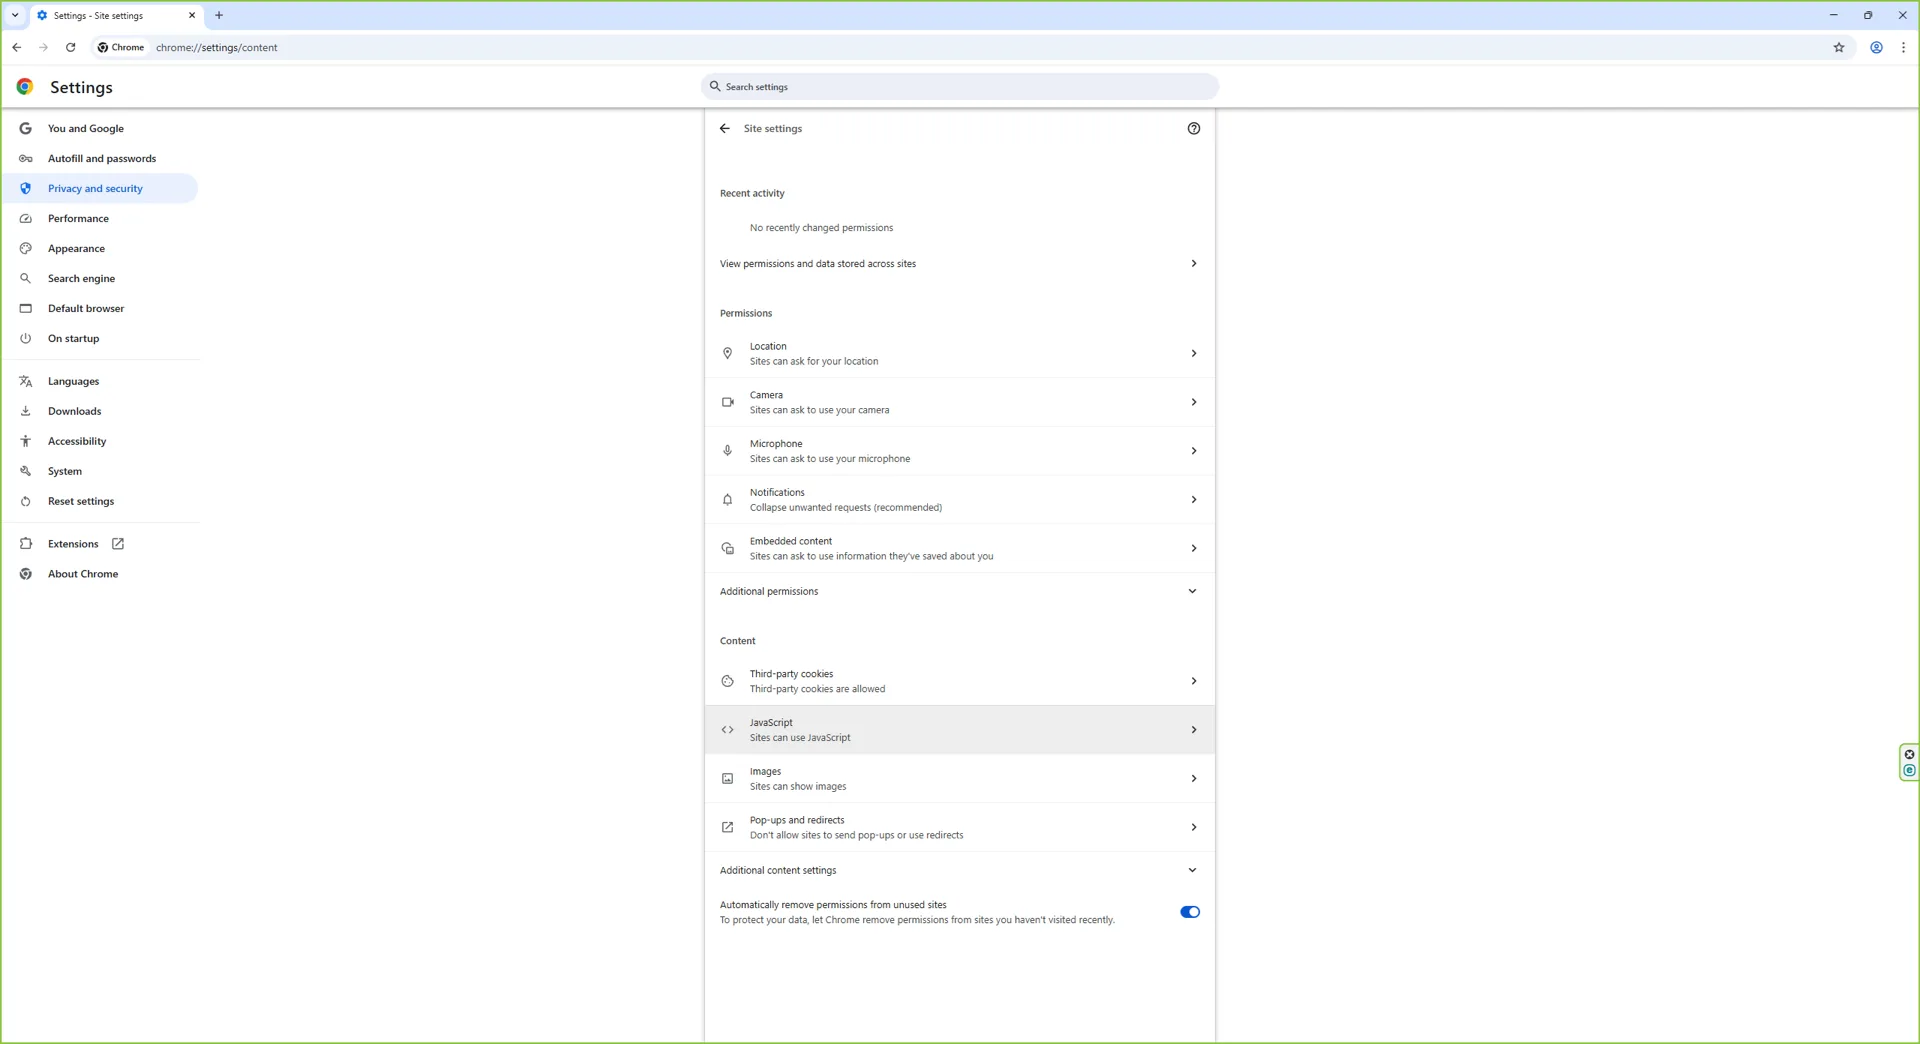
Step 6: Confirm the current state
If JavaScript is currently allowed, the top option reads Sites can use JavaScript and the radio button is selected. This is Chrome's default for new installs.
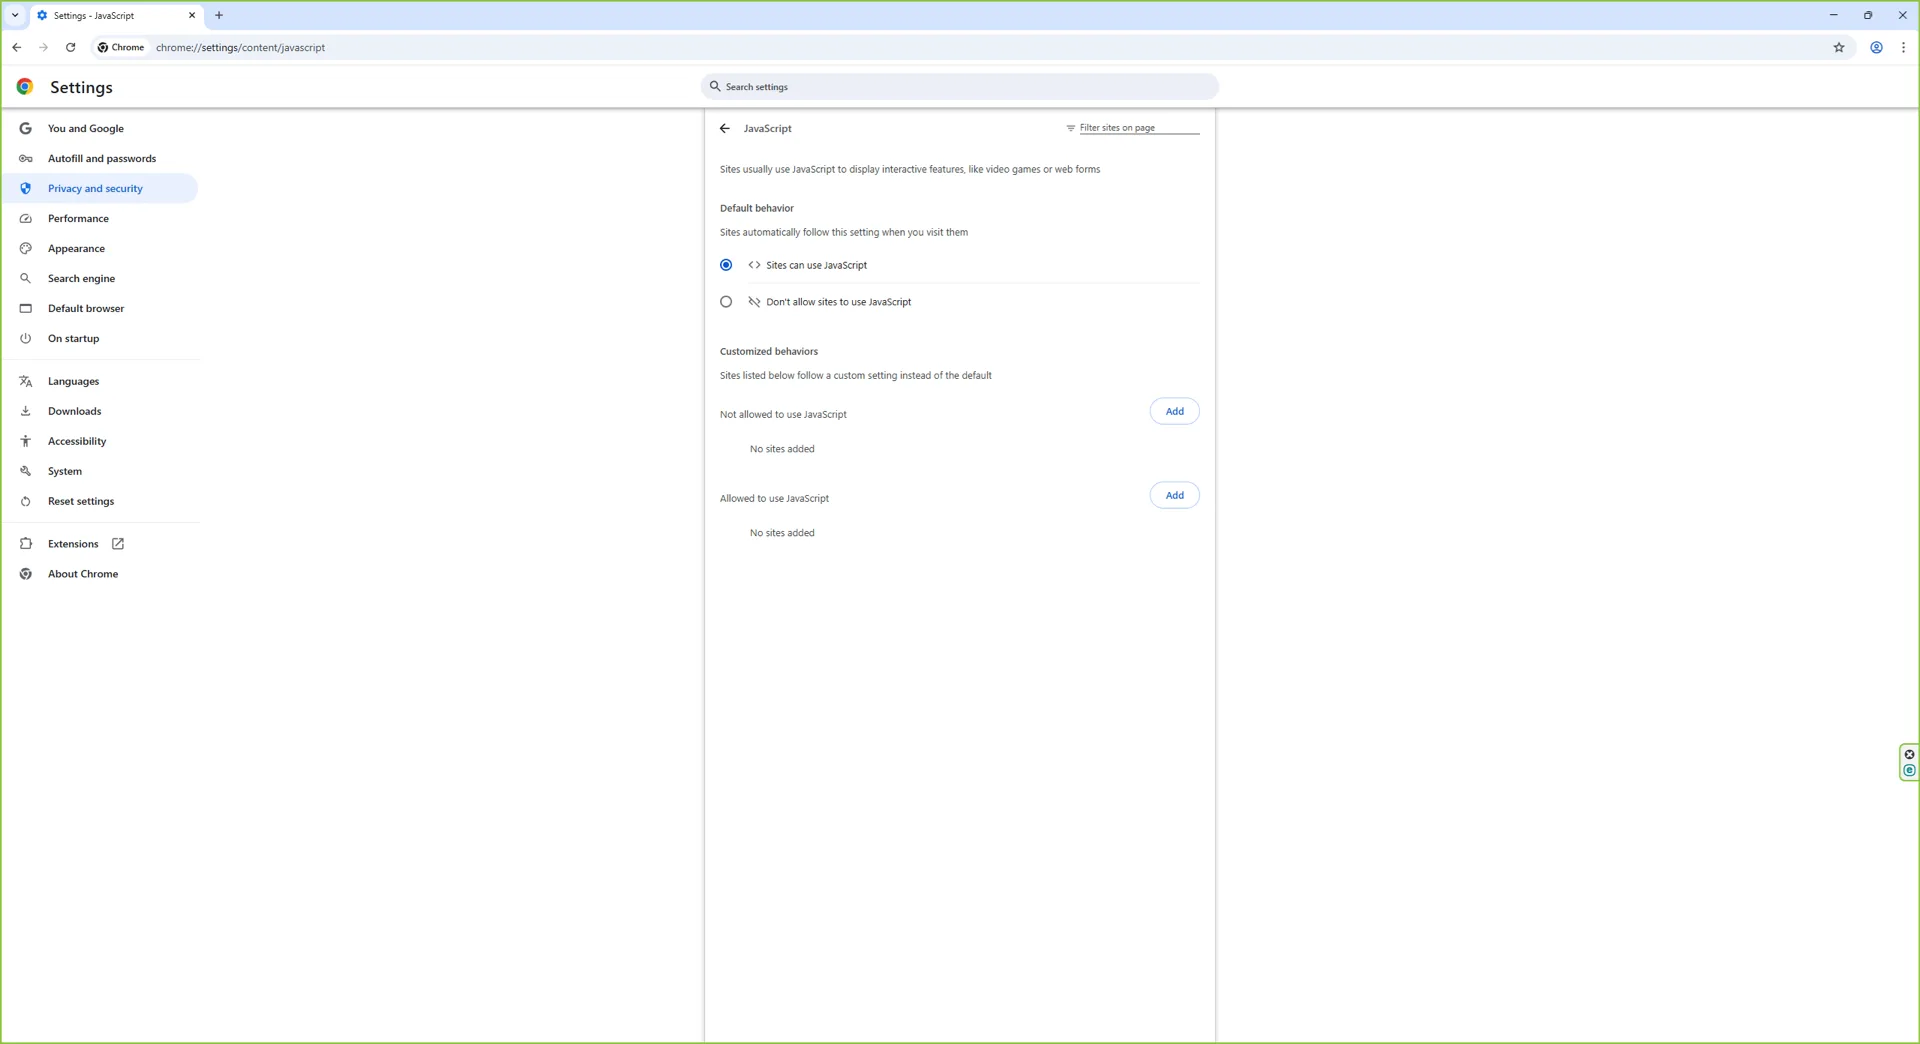
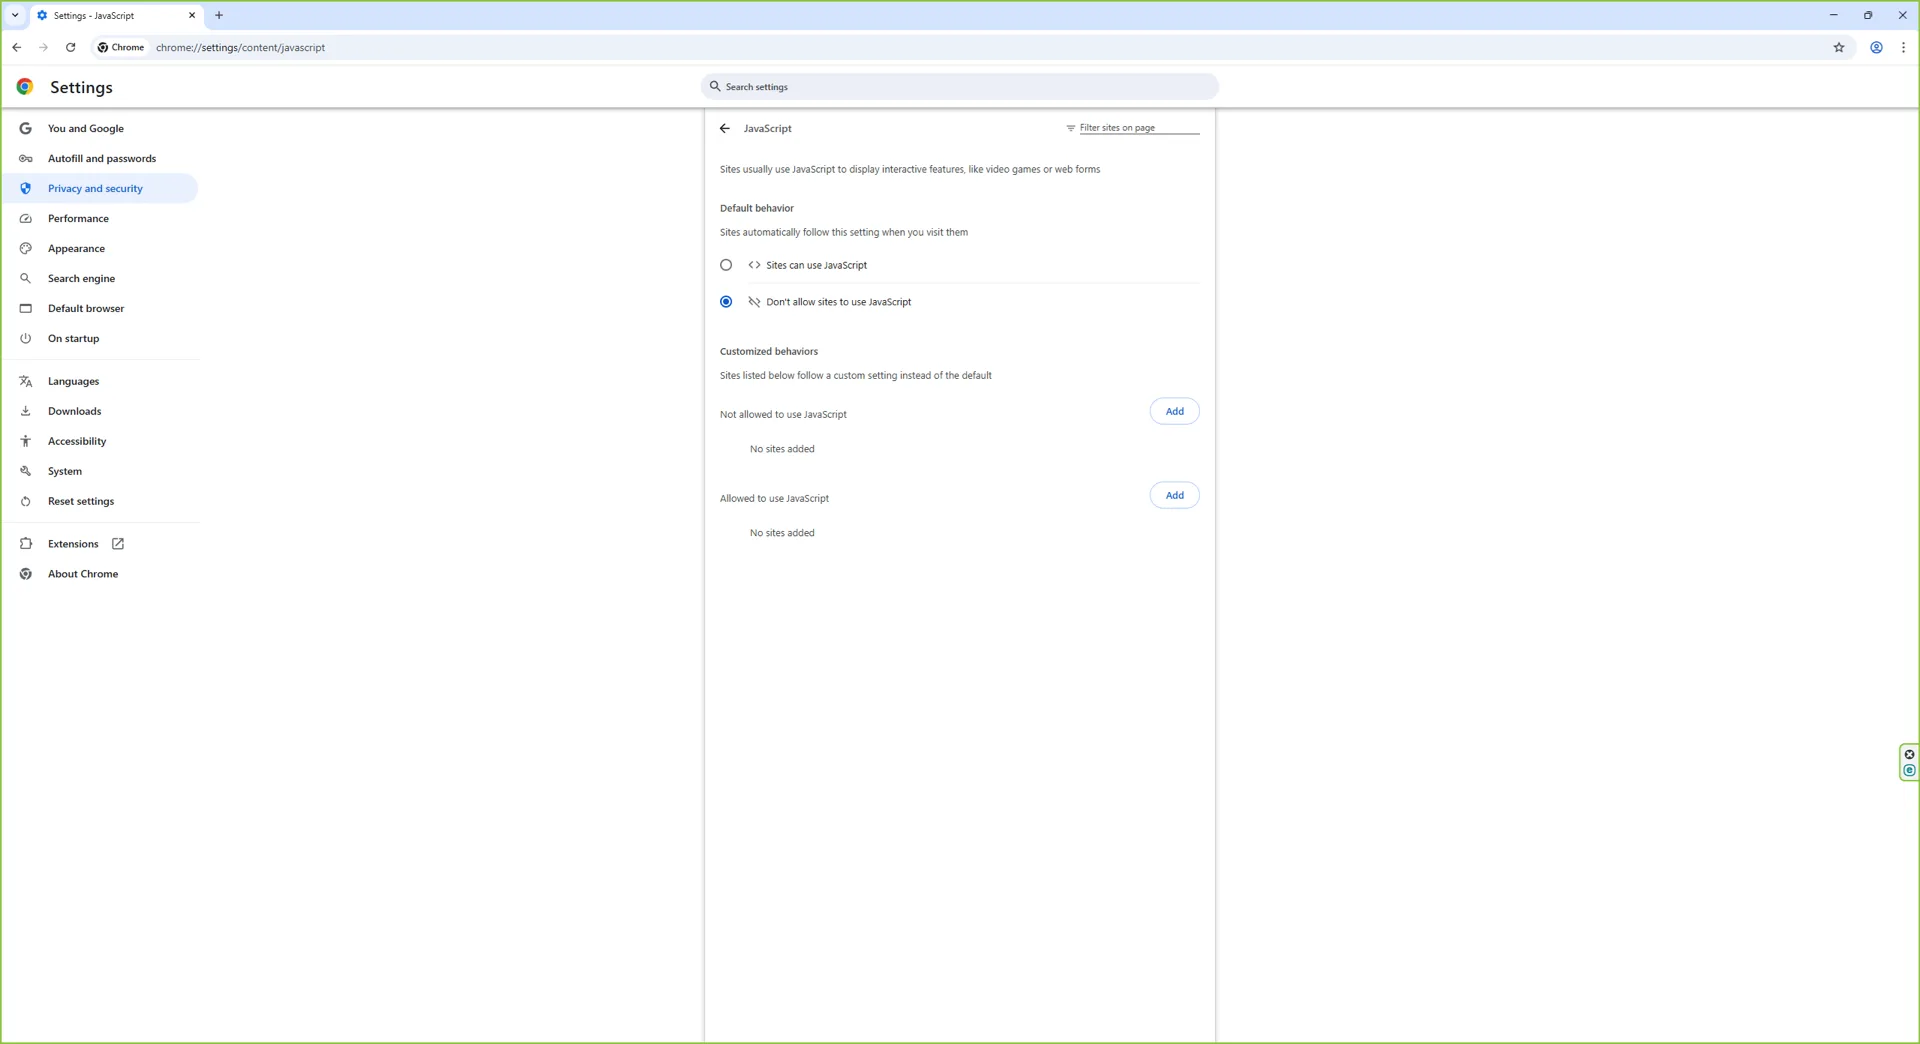
Step 7: Switch to "Don't allow sites to use JavaScript"
Under Default behavior, select Don't allow sites to use JavaScript. That single radio button is the global off switch. From this point on, every page you load will be served without running any JavaScript, including pages that were already open in other tabs once you refresh them.
2. Disable JavaScript in Chrome on macOS Sequoia
Step 1: Open Chrome
Launch Chrome from Launchpad, Spotlight, or the Dock. You can press Cmd + , at any point to jump straight to the Settings tab and skip the menu entirely.
Step 2: Open the Chrome menu
Click the three-dot menu in the top-right of the Chrome window (not the macOS menu bar at the top of the screen).

Step 3: Open Settings
Choose Settings (or press Cmd + ,). Chrome opens its settings tab.
Step 4: Site settings under Privacy and security
Click Privacy and security in the left-hand sidebar, then click Site settings. Scroll down to the Content section.

Step 5: Open the JavaScript permission
Click JavaScript. Chrome opens the same permission detail page you saw on Windows.
Step 6: Confirm the current state
If JavaScript is currently allowed, Sites can use JavaScript is selected.
Step 7: Switch to "Don't allow sites to use JavaScript"
Select Don't allow sites to use JavaScript. The change is instant, no Save button required. Reload any open tab to see it take effect.

Linux and Chromebook follow the same flow as Windows: three-dot menu, Settings, Privacy and security, Site settings, JavaScript, then flip the radio button.
The fast path: chrome://settings/content/javascript
If you do this often, skip the menu entirely. Type or paste this into the Chrome address bar:
chrome://settings/content/javascript
Press Enter and Chrome takes you straight to the JavaScript permission page. Same toggle, same allow-list, no clicking through Privacy menus. Bookmark it if you flip the switch regularly for testing or browsing on flaky networks.
Chrome accepts a few related shortcuts too:
chrome://settings/contentopens the full Site settings page (all permissions, not just JavaScript).chrome://settings/privacyopens the broader Privacy and security panel.
Allow JavaScript on a single site (allow-list workflow)
This is the setup most privacy-conscious users actually want: JavaScript blocked everywhere by default, then explicitly allowed on the small set of sites you trust and use heavily.
- Make sure Default behavior on
chrome://settings/content/javascriptis set to Don't allow sites to use JavaScript. - Scroll down to the Customised behaviours section. You will see two lists: Not allowed to use JavaScript and Allowed to use JavaScript.
- Click Add next to Allowed to use JavaScript.
- Type the site you want to allow, for example
[*.]github.comto allow GitHub and all its subdomains, orhttps://mail.google.comto scope it to a single host. - Click Add. The site appears in the allow-list and JavaScript runs there as normal.
The leading [*.] pattern is Chrome's wildcard for "any subdomain". So [*.]example.com covers www.example.com, app.example.com, api.example.com, and so on. Without the wildcard, the rule applies only to the exact host you typed.
You can also do this from a tab that is already open: click the small lock or tune icon to the left of the URL, choose Site settings, find JavaScript in the permissions list, and switch it from Block (default) to Allow. Chrome adds the site to your customised allow-list automatically.
Block JavaScript on a single site (block-list workflow)
The mirror image is also useful: JavaScript on globally, but switched off for a few specific sites that abuse it. Maybe a news site that interrupts every paragraph with a paywall script, or a forum where the JavaScript-driven layout is worse than the plain HTML version.
- Leave Default behavior on Sites can use JavaScript.
- Under Customised behaviours, click Add next to Not allowed to use JavaScript.
- Enter the site, for example
[*.]heavynewssite.com, and click Add.
That site now loads with JavaScript blocked while the rest of the web continues to work normally.
How to verify JavaScript is now off
Settings can lie. Extensions can override them. The only way to be sure is to load a page that actively tests the result.
- Open a new tab and visit any JavaScript-detection page (this site has one too: it will show a clear "JavaScript is disabled" message when the engine is off).
- Open Chrome's DevTools with Cmd + Option + I (Mac) or Ctrl + Shift + I (Windows, Linux, Chromebook).
- Click the Console tab.
- Type
1+1and press Enter.
If the console returns 2, JavaScript is still running on that page (DevTools sometimes runs in a privileged context even when the page does not). The page-level signal is what counts: if a JS-detection site says JS is off and a page that relies on JavaScript stays blank, your toggle is doing its job.
Disable JavaScript only inside Chrome DevTools (developer testing)
Web developers often want JavaScript off for one specific tab during testing, without changing the global setting. Chrome supports this directly:
- Open the page you want to test.
- Press Cmd + Option + I (Mac) or Ctrl + Shift + I (Windows, Linux, Chromebook) to open DevTools.
- Open the Command Menu with Cmd + Shift + P (Mac) or Ctrl + Shift + P (Windows, Linux, Chromebook).
- Type
Disable JavaScriptand press Enter. - Reload the page. JavaScript is now off for this tab only, while DevTools stays open.
To switch it back on, run the same command (it now reads Enable JavaScript) or simply close DevTools.
Disable JavaScript on Chrome for Android and iOS
Mobile Chrome on Android still ships the toggle. iOS Chrome is technically a wrapper around Safari's WebKit, so its JavaScript handling follows iOS rather than the Chromium settings most desktop users are used to.
Chrome on Android
Tap the three-dot menu, choose Settings, scroll to Site settings, tap JavaScript, and switch the toggle off. The same per-site exception list works as on desktop. Android screenshots are not included here because the menu copy varies between Chrome 120, 121, and 122; the in-app labels above are accurate across all current versions.
Chrome on iOS and iPadOS
There is no JavaScript toggle inside Chrome on iOS. Apple requires every browser on iOS and iPadOS to use the system WebKit engine, so the only way to turn JavaScript off is through Safari's setting in the iOS Settings app. That setting affects WebKit system-wide, including Chrome, Edge, Firefox, Brave, and any other browser on the device.
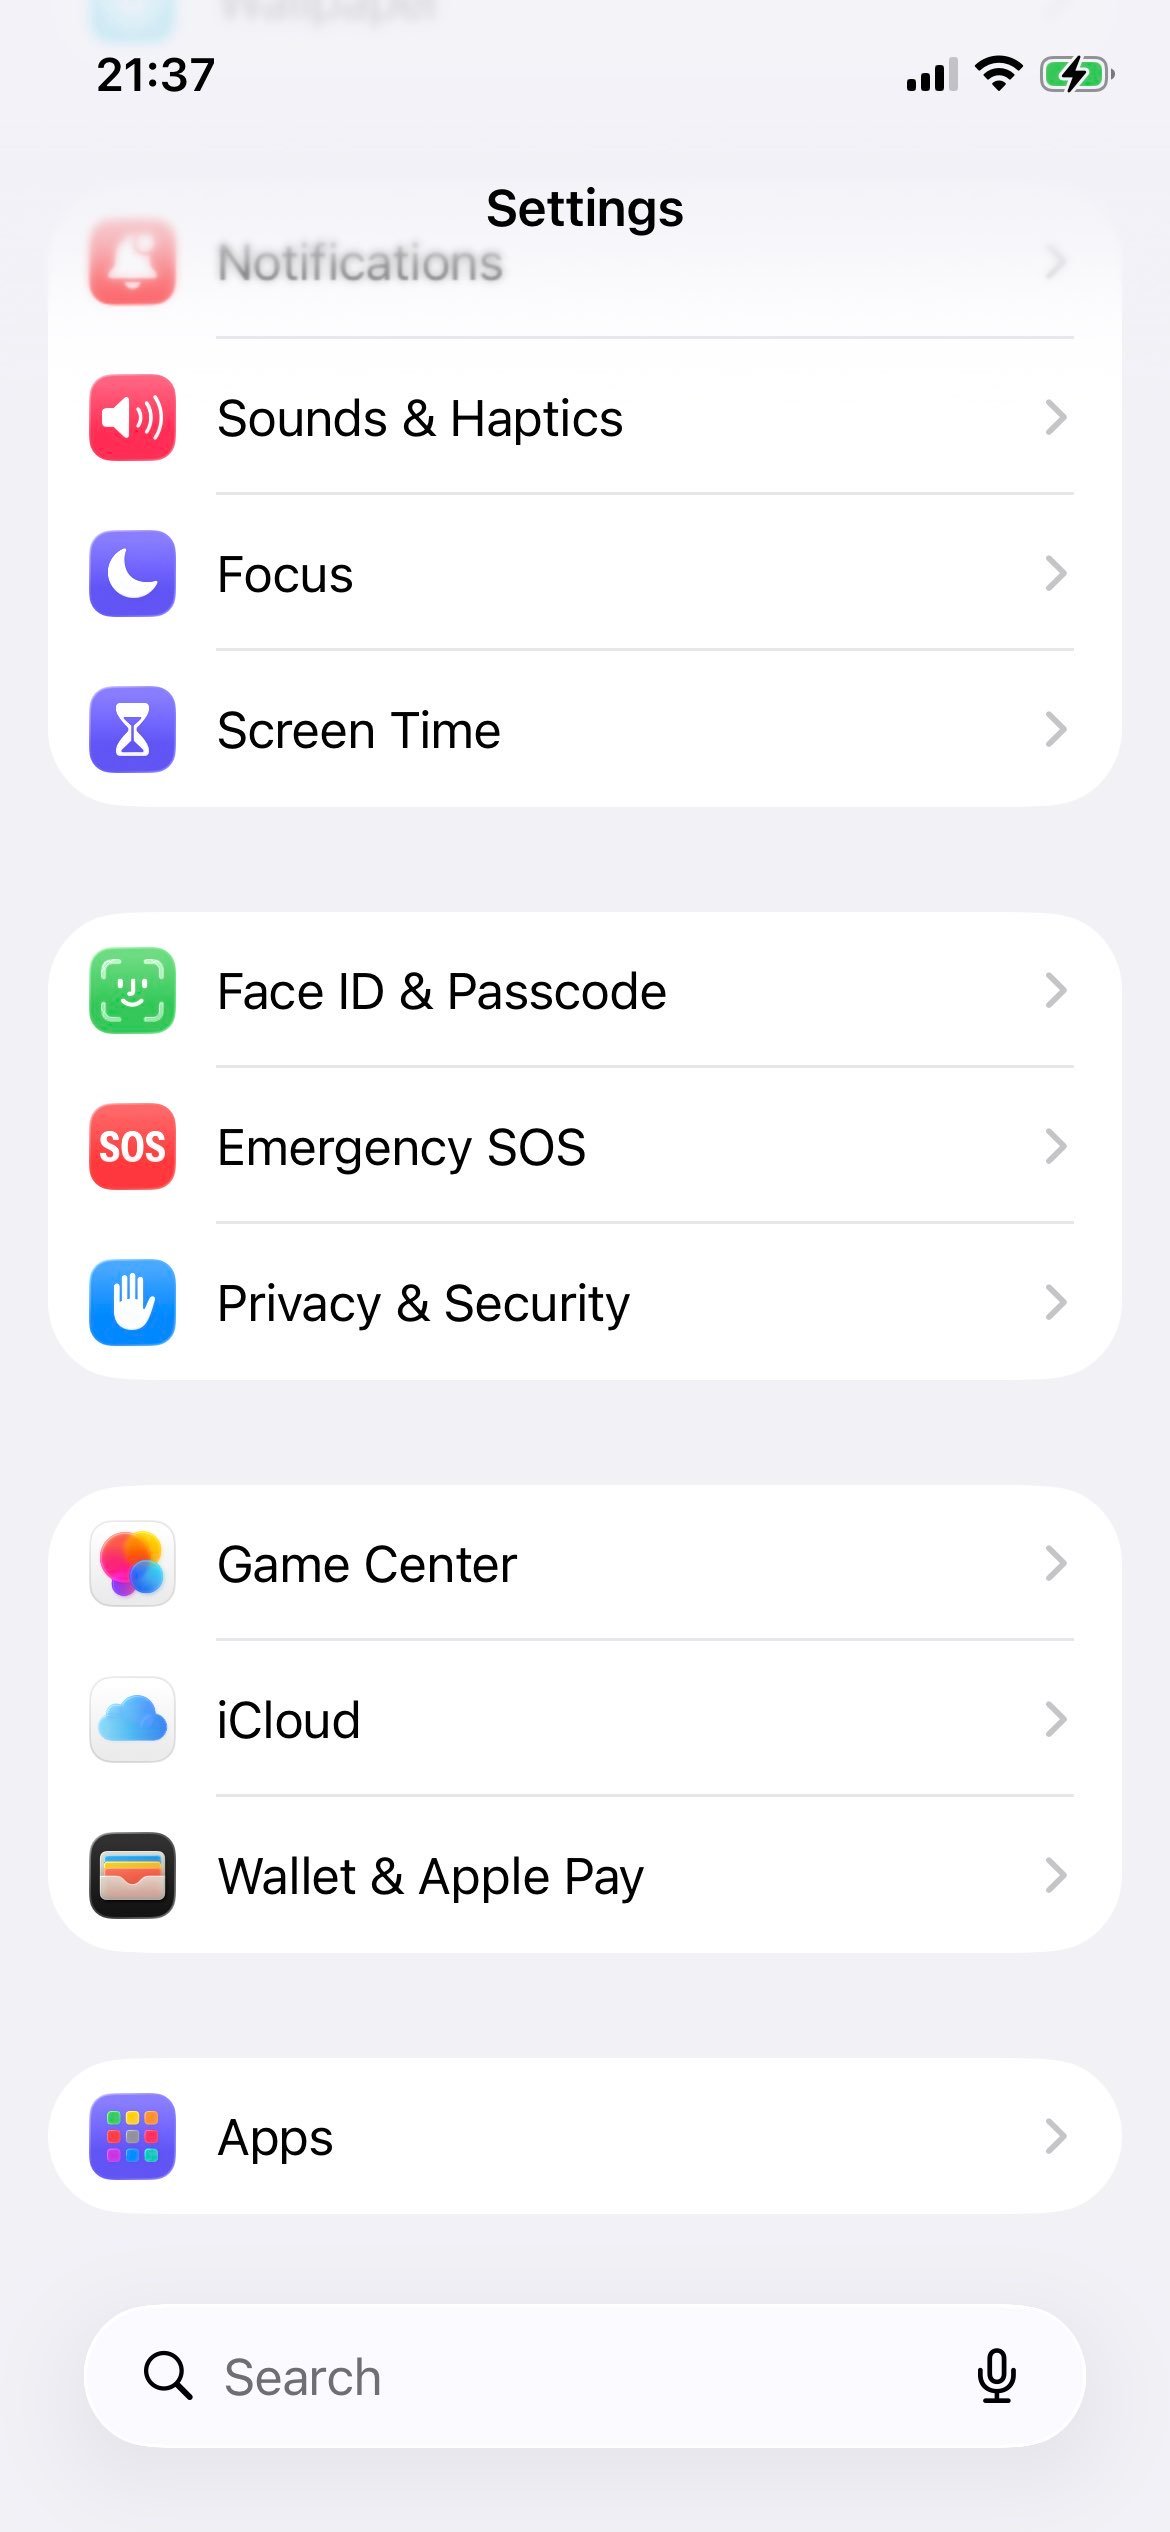
Step 1: Open the Settings app
On the iPhone or iPad home screen, tap the grey Settings icon.
Step 2: Tap "Apps"
Scroll down and tap Apps. iOS 26 groups all per-app settings (Safari, Mail, Photos, and so on) under this single entry.
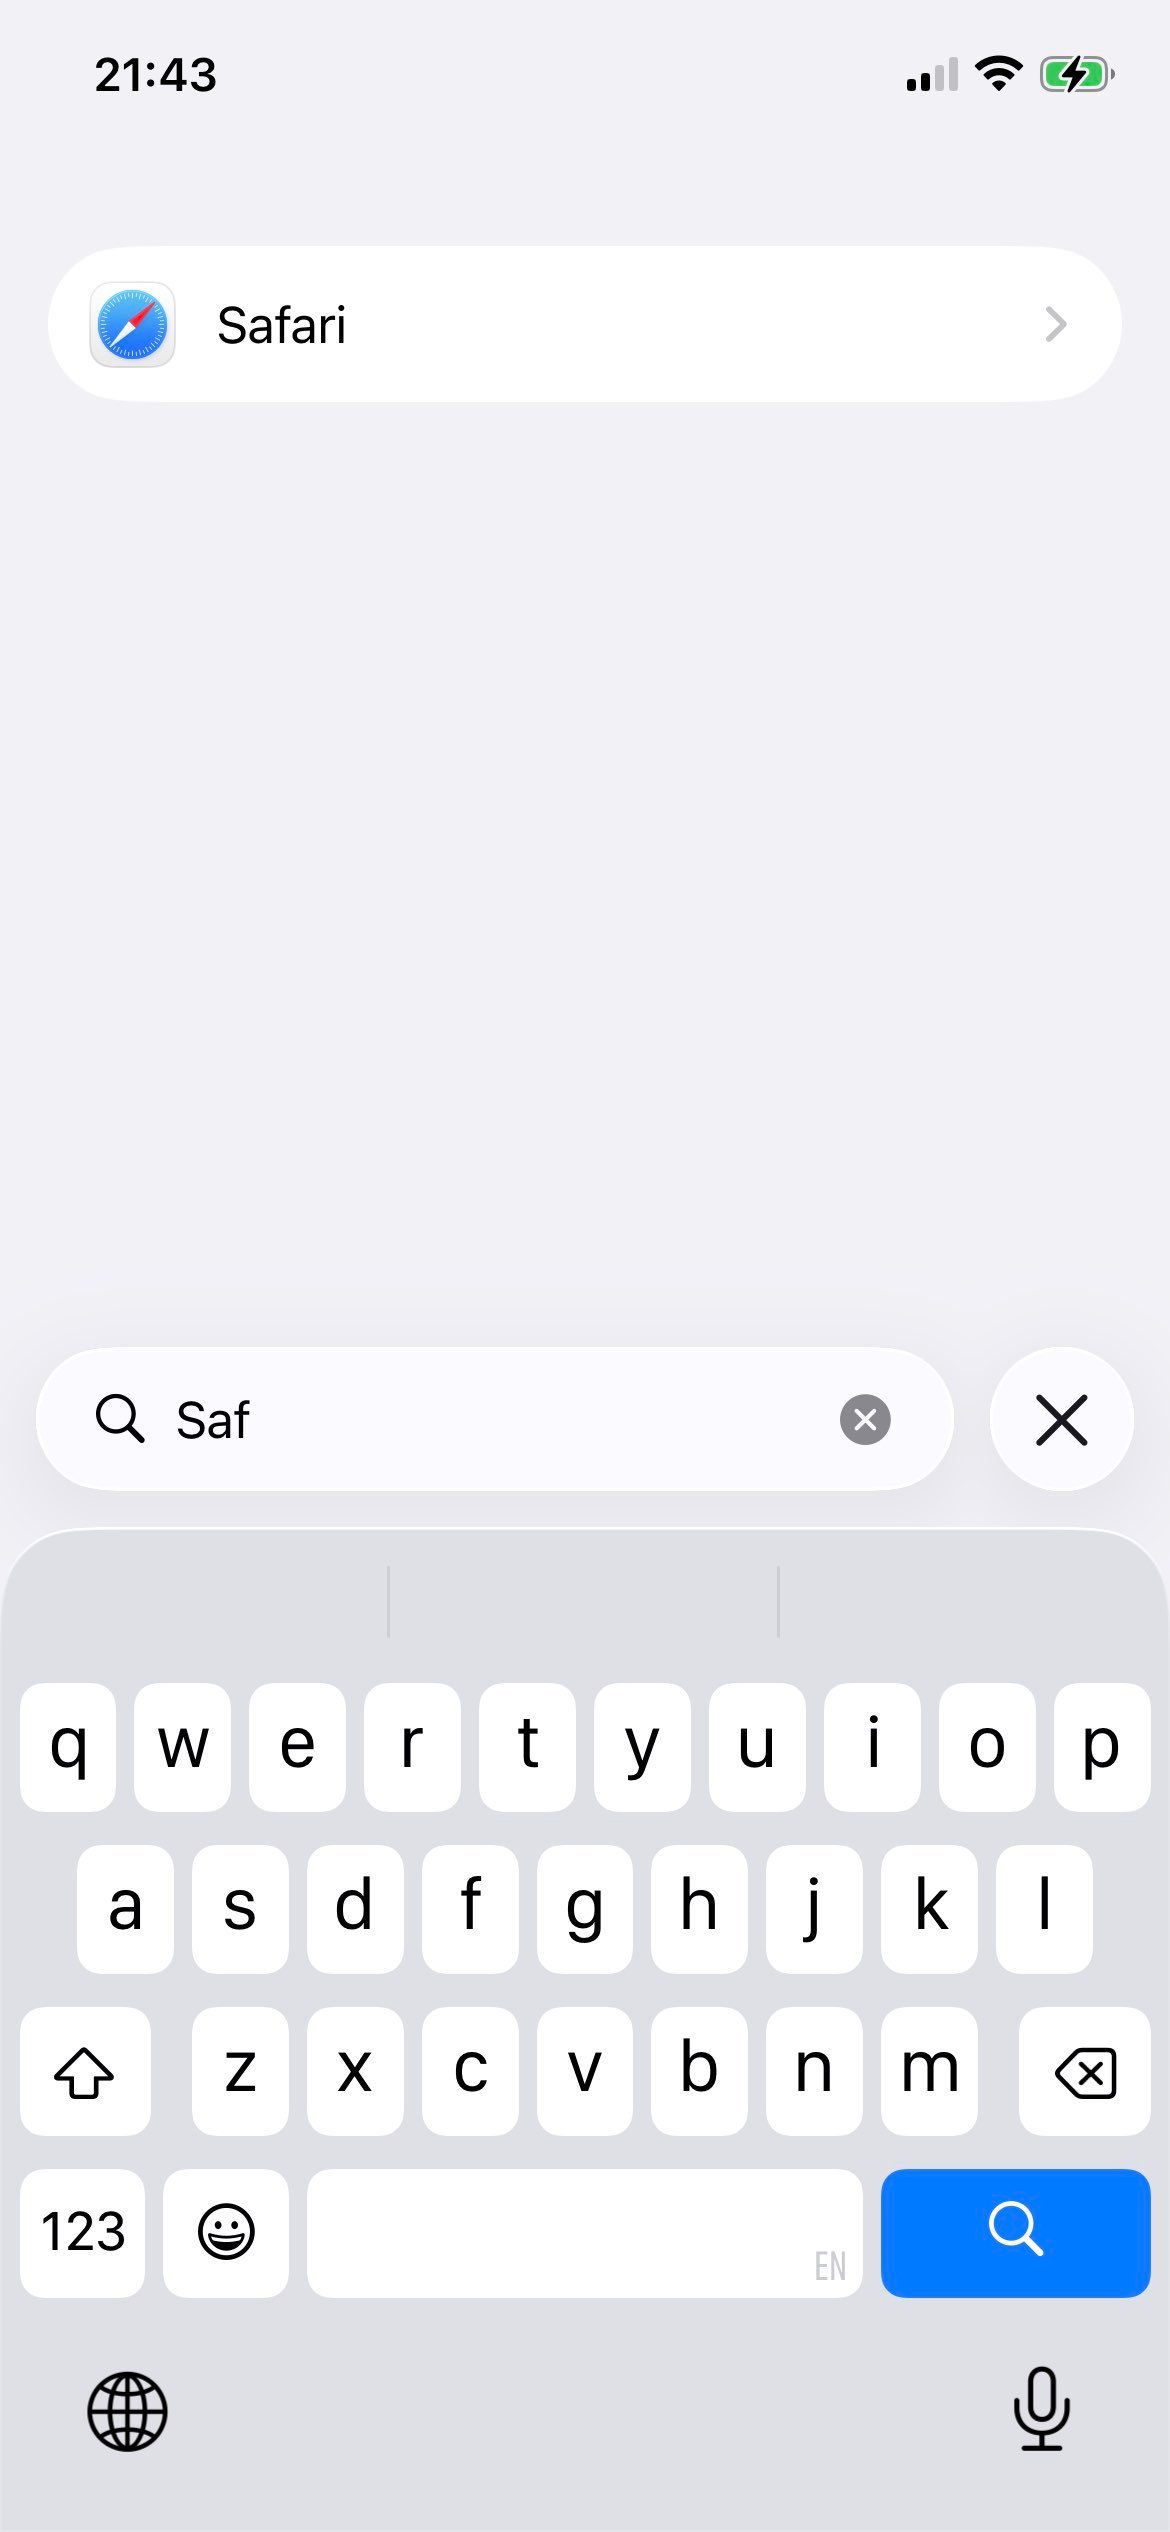
Step 3: Tap Safari
In the alphabetical list of apps, tap Safari.
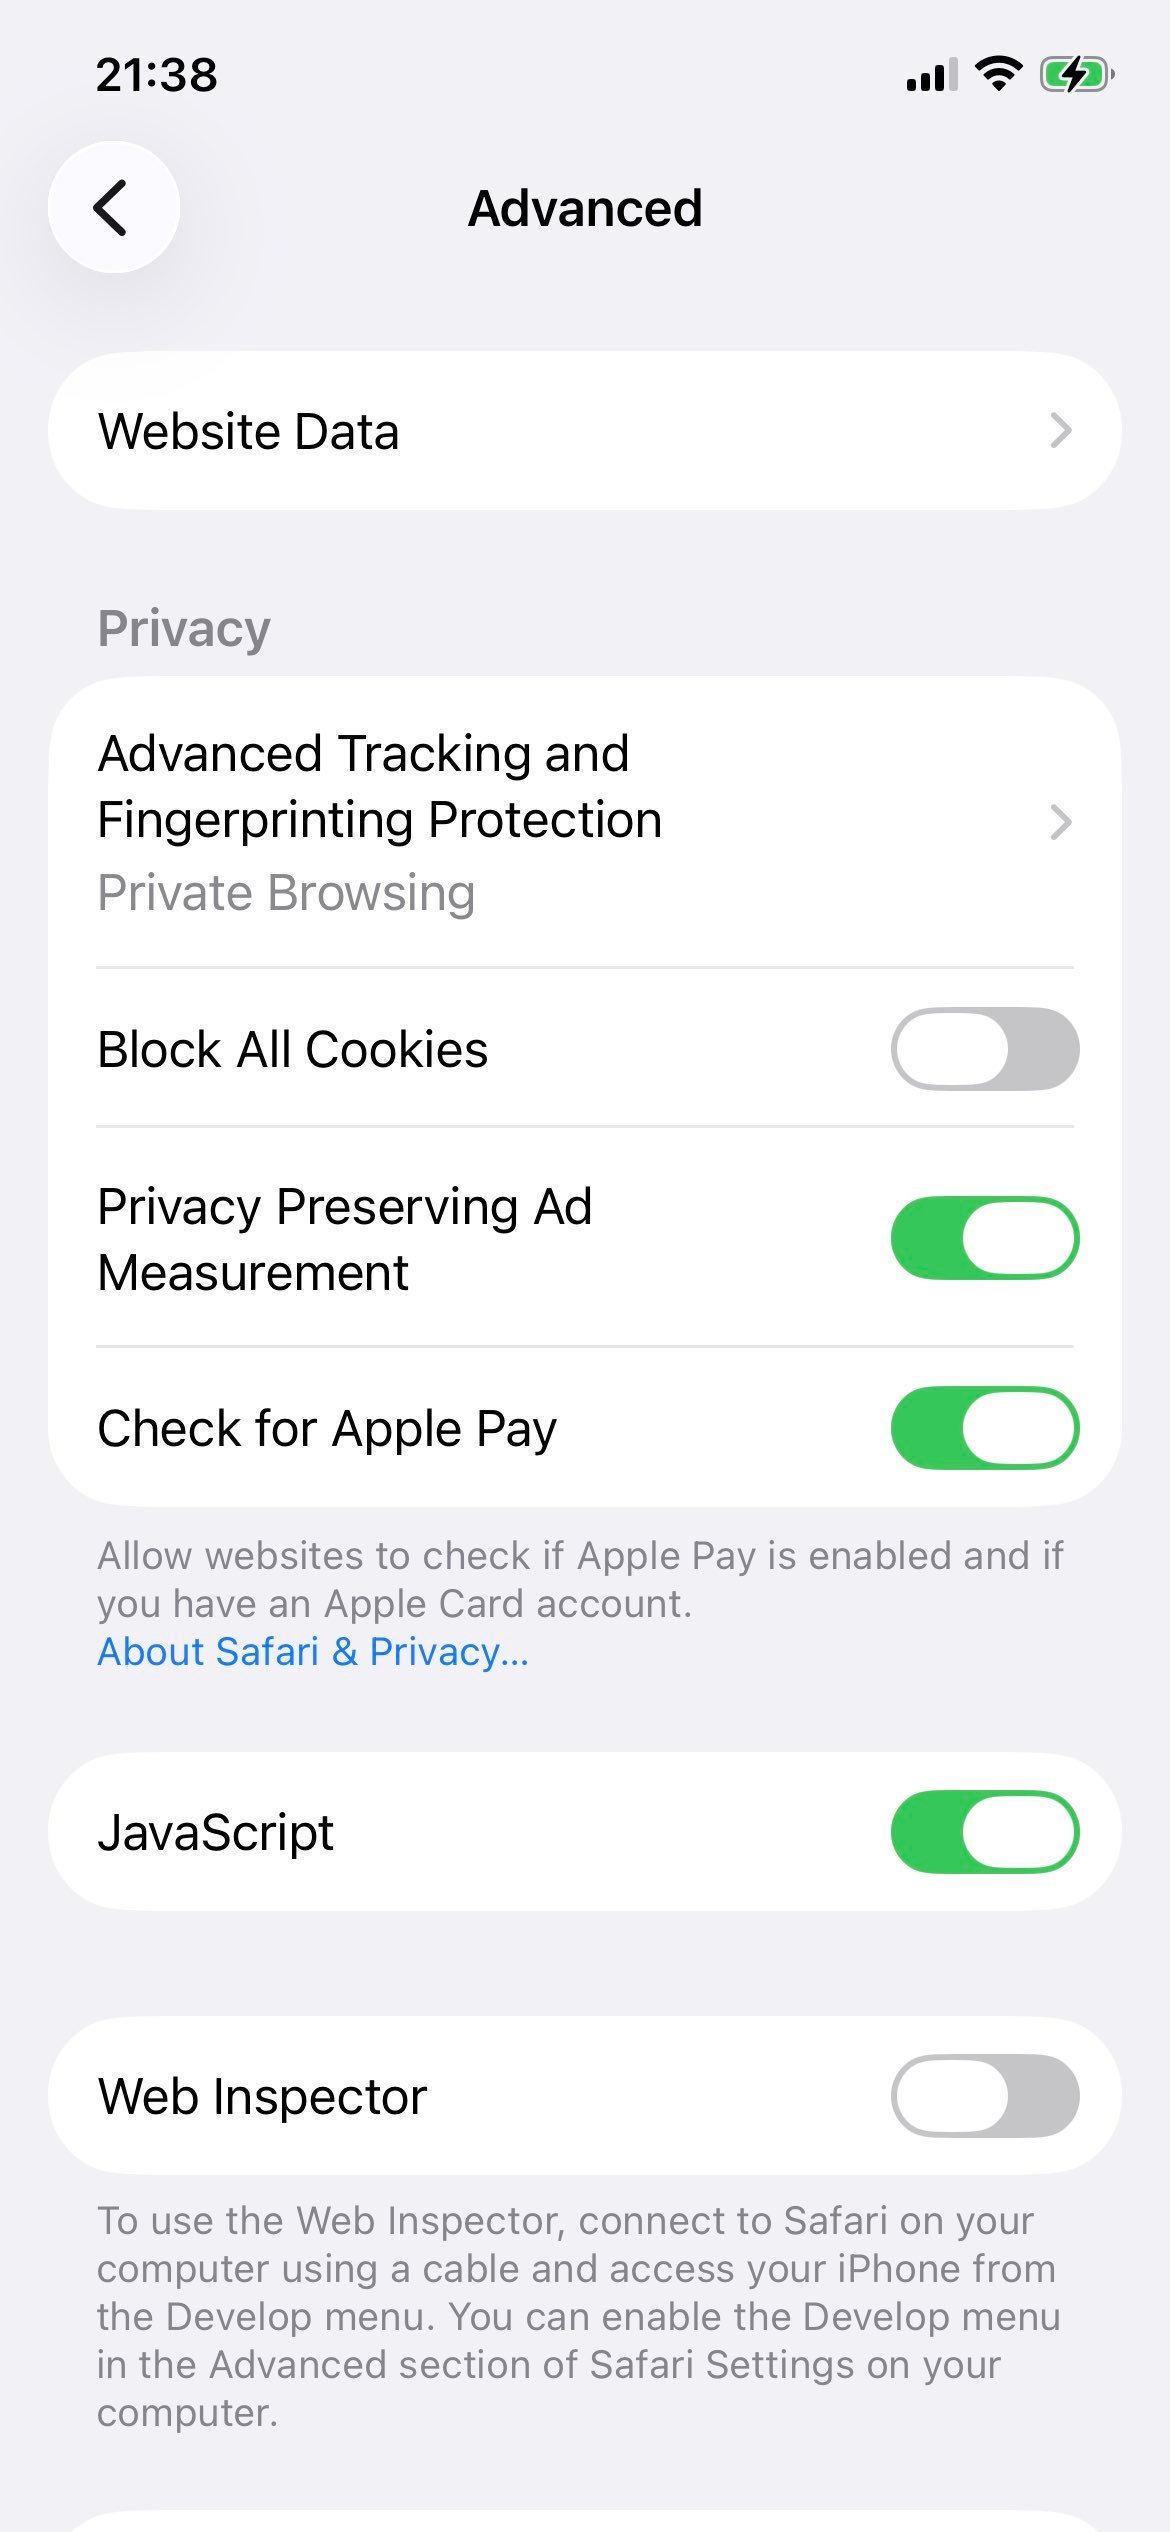
Step 4: Open Advanced
Scroll to the bottom of Safari's settings and tap Advanced.
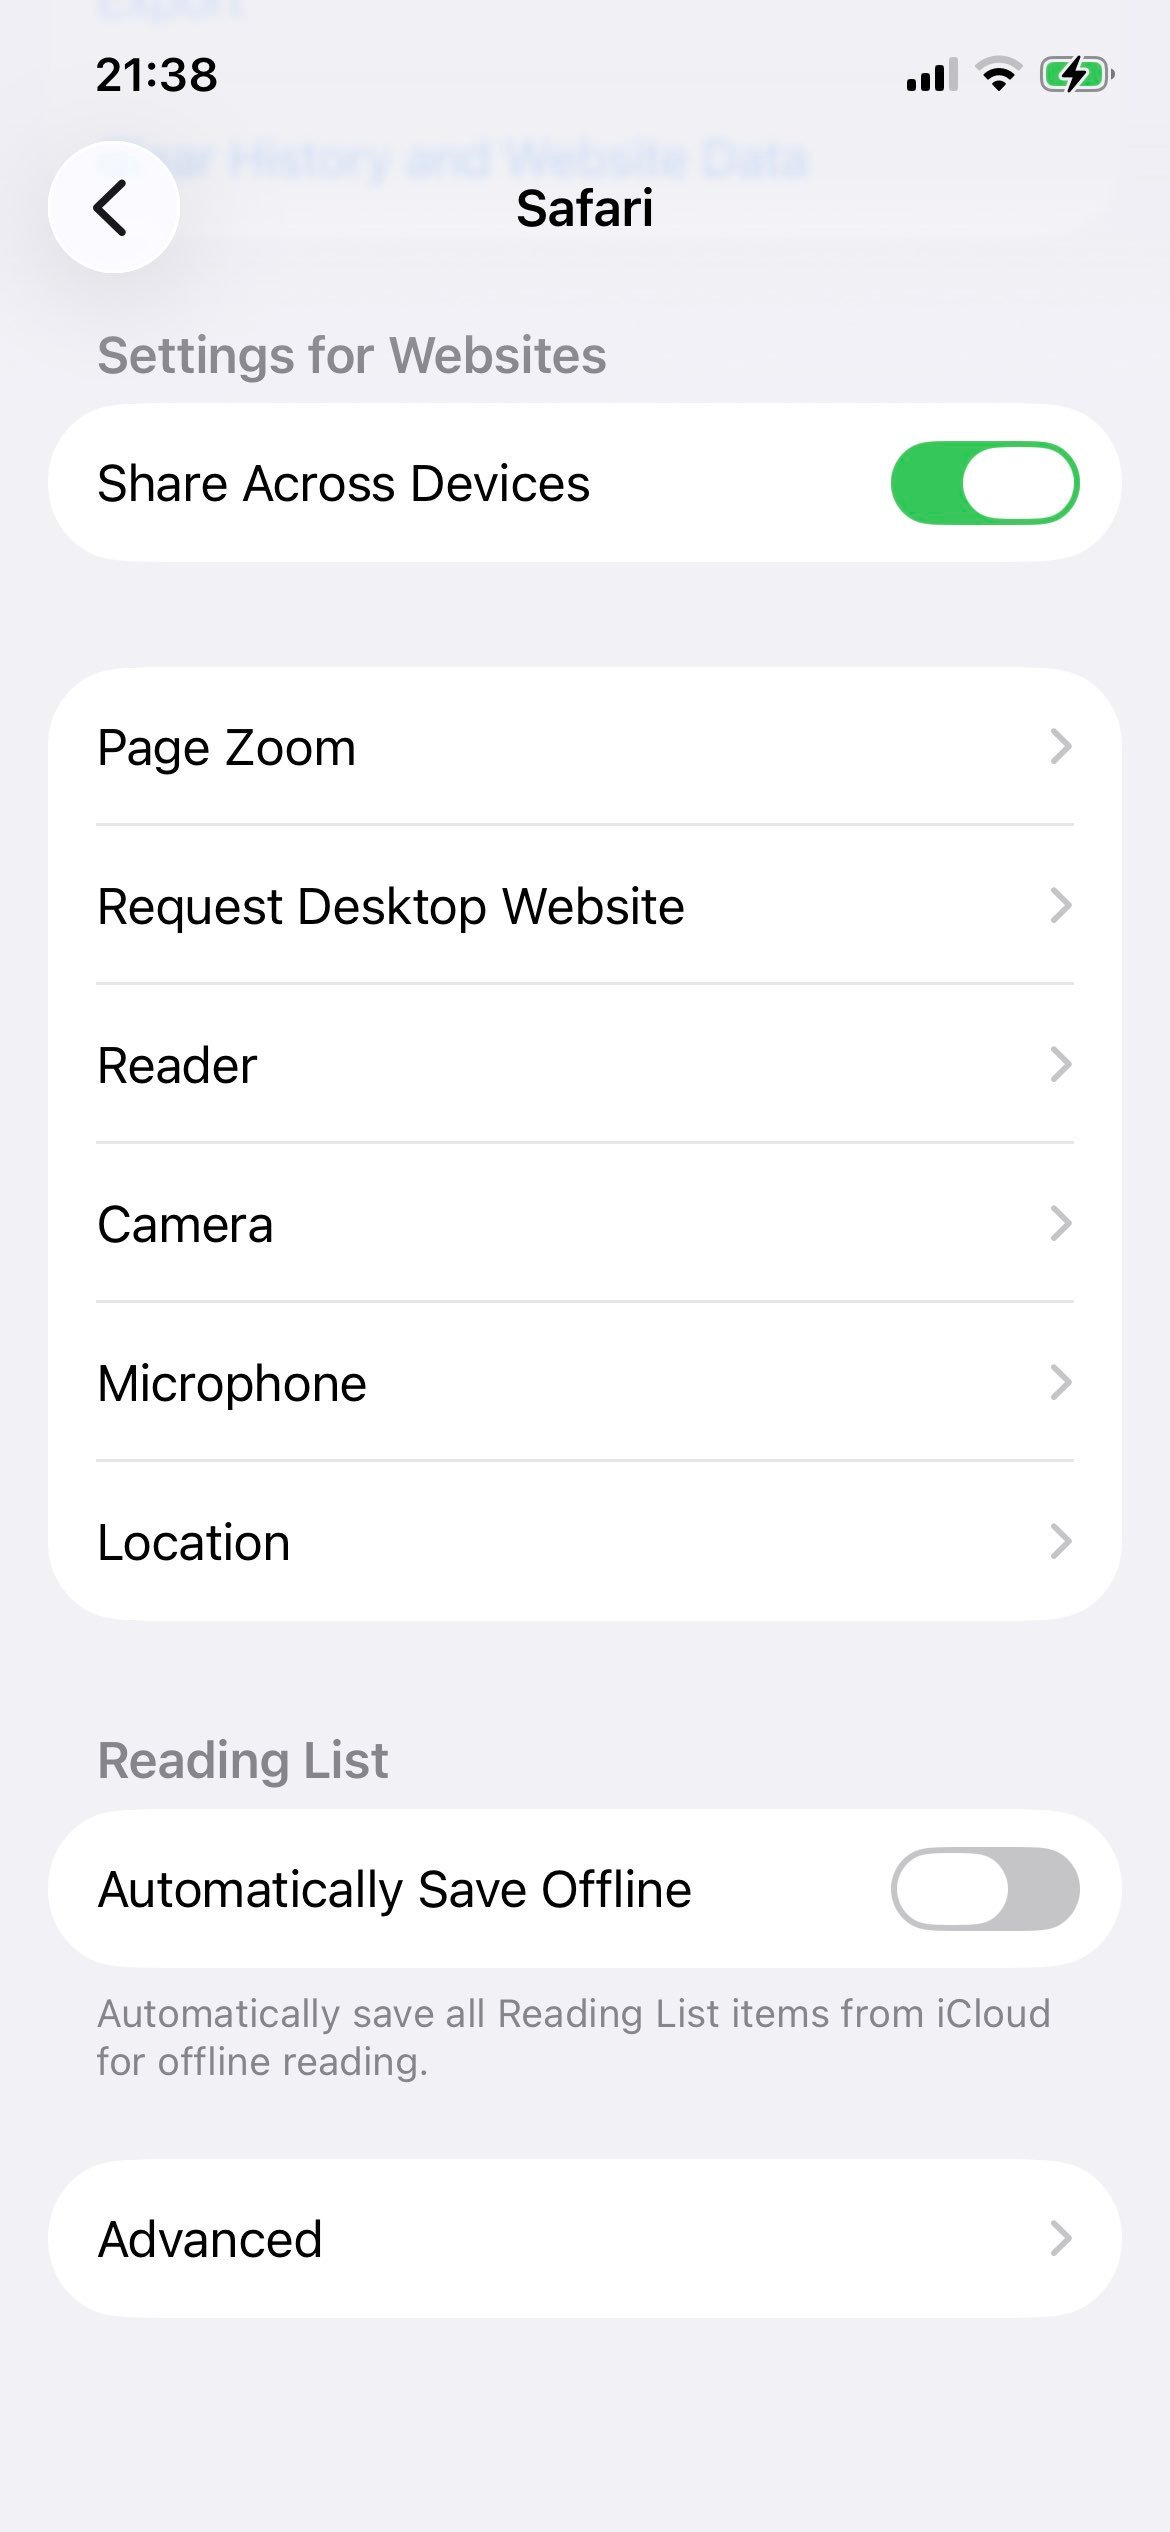
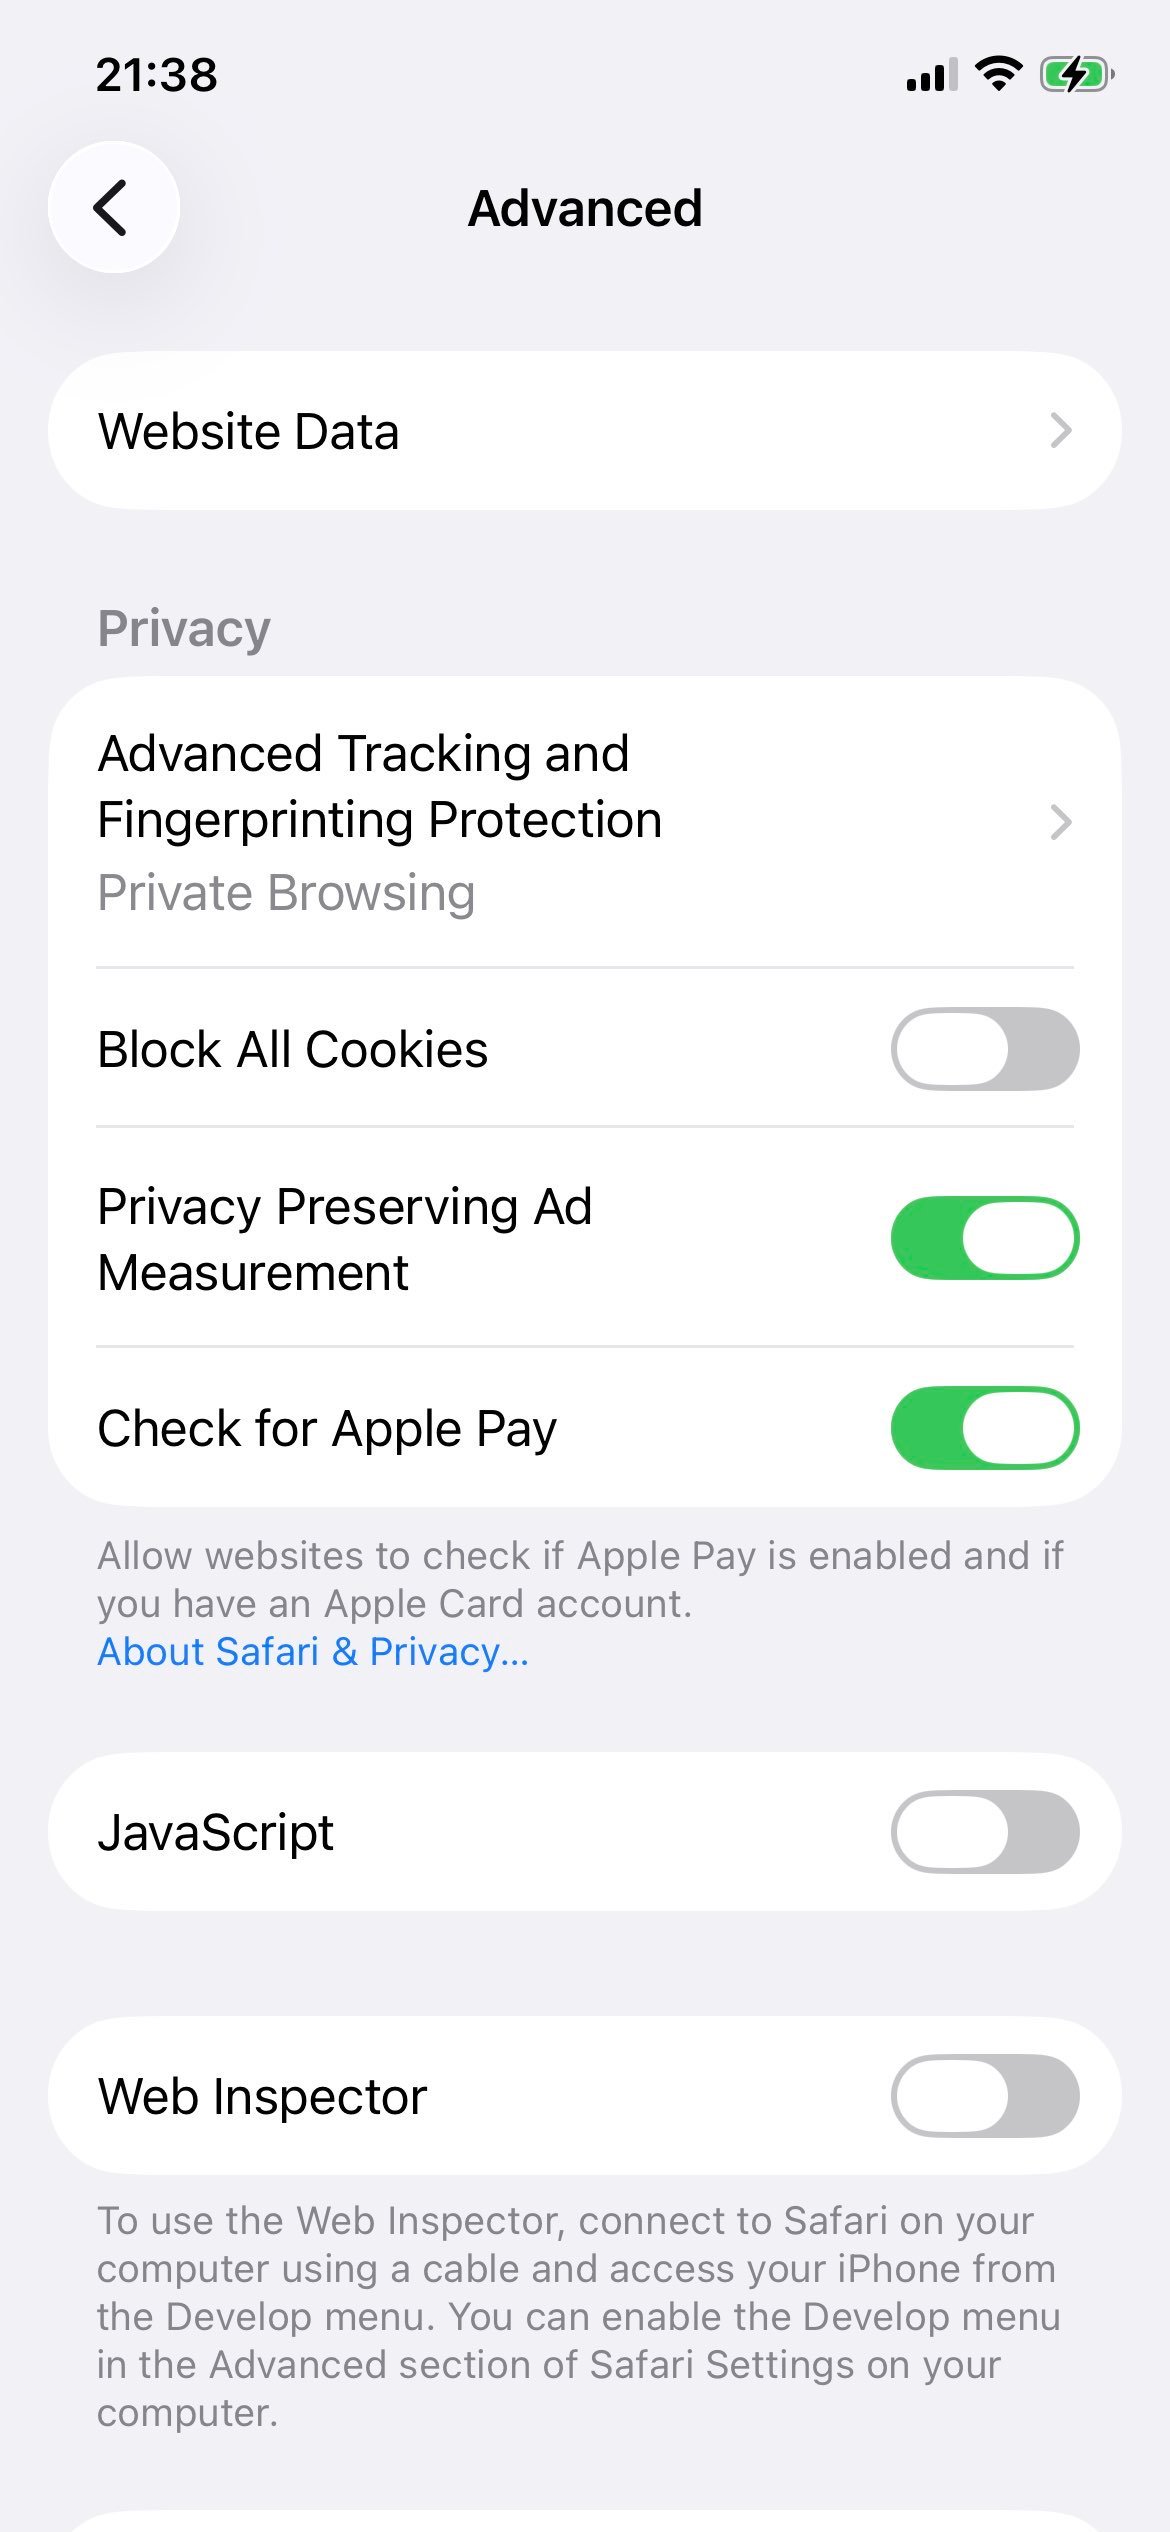
Step 5: Find the JavaScript toggle
The Advanced page shows a JavaScript switch. By default it is on (green).
Step 6: Switch JavaScript off
Tap the toggle. It turns grey. JavaScript is now off across every browser on the device until you switch it back on.
What to do if a site you need is now broken
Three options, in order of how minimal the change is:
- Add the site to your allow-list (steps above). Most surgical option.
- Use a separate Chrome profile for browsing with JavaScript on. Click your profile picture in the top-right of Chrome, choose Add, and create a second profile that keeps JavaScript enabled. Switch profiles when you need a JS-heavy site to work.
- Re-enable JavaScript globally by setting Default behavior back to Sites can use JavaScript. Use the per-site block-list for the few sites you specifically want to block.
The allow-list approach is what most privacy-focused users settle on long-term. It keeps fingerprinting scripts off the dozens of sites you visit once and never come back to, while letting the small number you actually rely on keep working without friction.